Producing Animations#
At this point, we’ve seen how to import data, assign histogram bins and compute a variety of histograms. These histograms appear as interactive 3D plots.
These interactive plots are great for seeing the distributions of orientations and combinations of magnitude and orientation…
But, they aren’t easy to share with others in publications or presentations.
In the previous sections, we’ve covered a bit about how to generate videos from these 3D plots in order to share results. In this section, we’ll take this a bit farther.
In this section, we’ll see how to export a variety of animations on 3D spherical and nested spherical histograms using VectoRose. We’ll explore the different types of animations that can be produced, as well as the parameters that can be set to modify these animations.
As in the previous sections, we’ll use the vectors found in the NumPy file
two_clusters.npy. Once again, we’ll
start by loading the vectors from data.SampleData.TWO_CLUSTERS.
import vectorose as vr
import vectorose.data
my_vectors = vr.data.SampleData.TWO_CLUSTERS.load()
my_vectors = vr.util.remove_zero_vectors(my_vectors)
my_vectors
array([[ 0.01330902, 0.06486094, -0.08154041],
[ 0.19911095, 0.06809676, -0.02230348],
[ 0.14568445, 0.08995054, 0.06688315],
...,
[-0.0377645 , 0.35891606, 0.6731566 ],
[-0.13033349, 0.56234415, 0.27104764],
[-0.03287074, 0.60723468, 0.63249369]], shape=(200000, 3))
Now that we have our vectors loaded, we can begin our analysis.
Histogram Construction#
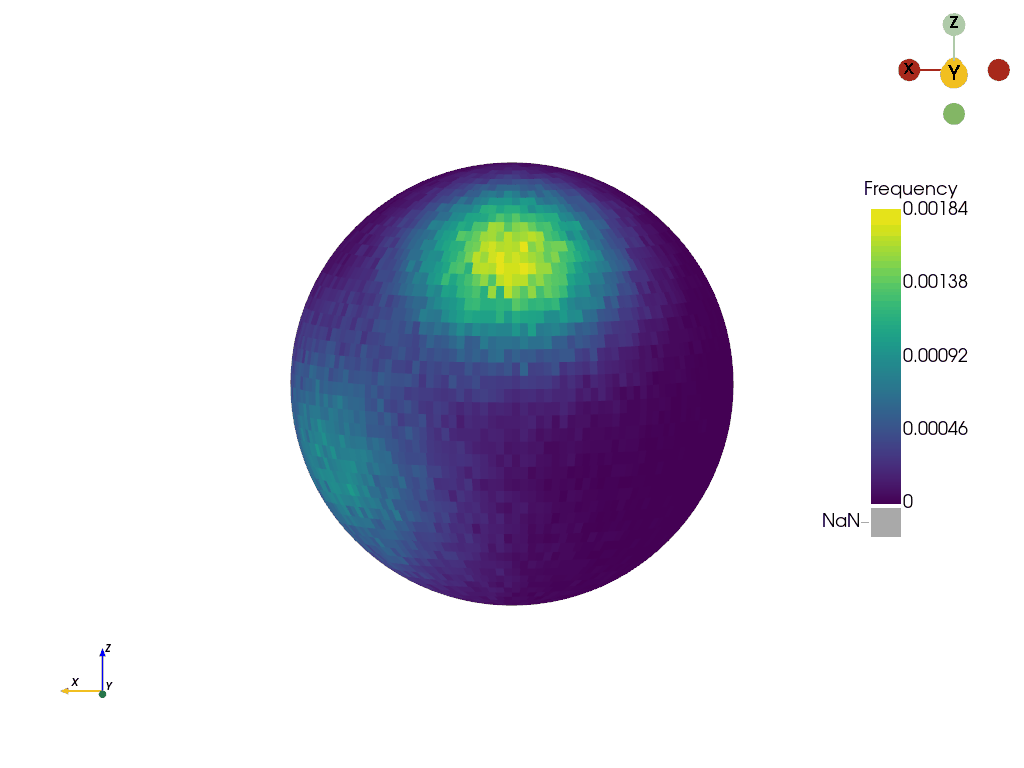
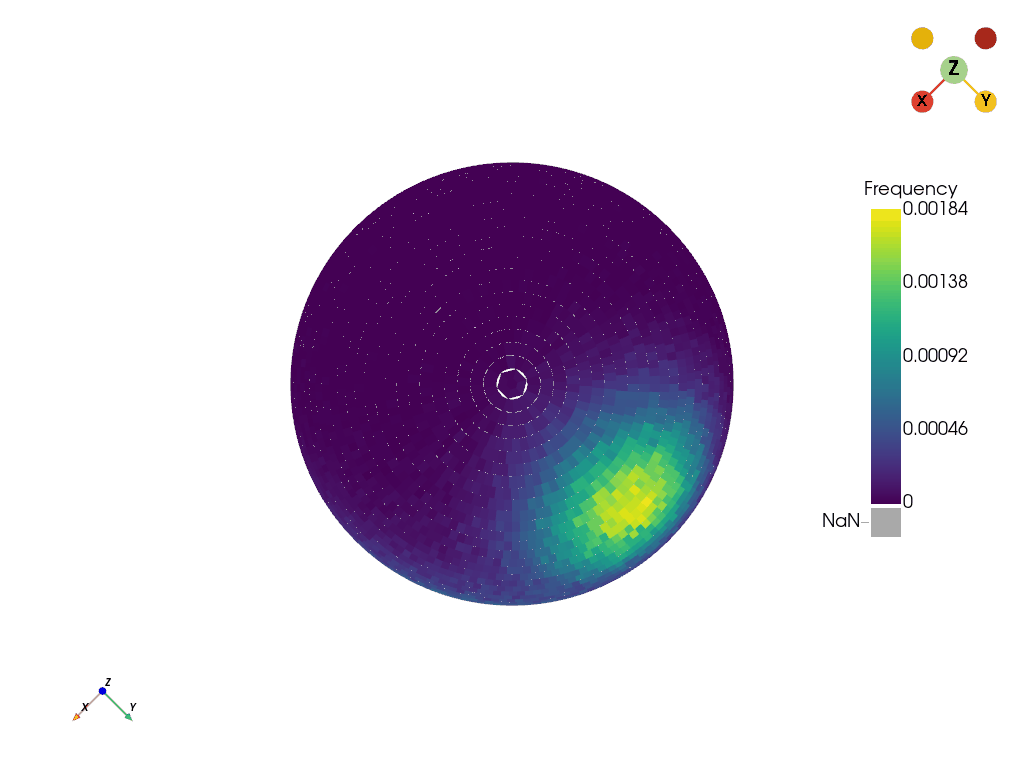
We’ll use the fine Tregenza sphere to construct our histograms. To allow fine-grained analysis of the magnitudes, we’ll use 32 shells. As usual, we will assign the vectors to bins, create the histograms and construct the meshes that we will use to visualise the histograms.
my_sphere = vr.tregenza_sphere.FineTregenzaSphere(number_of_shells=32)
labelled_vectors, magnitude_bins = my_sphere.assign_histogram_bins(my_vectors)
my_bivariate_histogram = my_sphere.construct_histogram(labelled_vectors)
my_orientation_histogram = my_sphere.construct_marginal_orientation_histogram(
labelled_vectors
)
my_bivariate_meshes = my_sphere.create_histogram_meshes(my_bivariate_histogram, magnitude_bins)
my_orientation_mesh = my_sphere.create_shell_mesh(my_orientation_histogram)
And, as usual, we will construct a SpherePlotter for each
histogram we want to visualise.
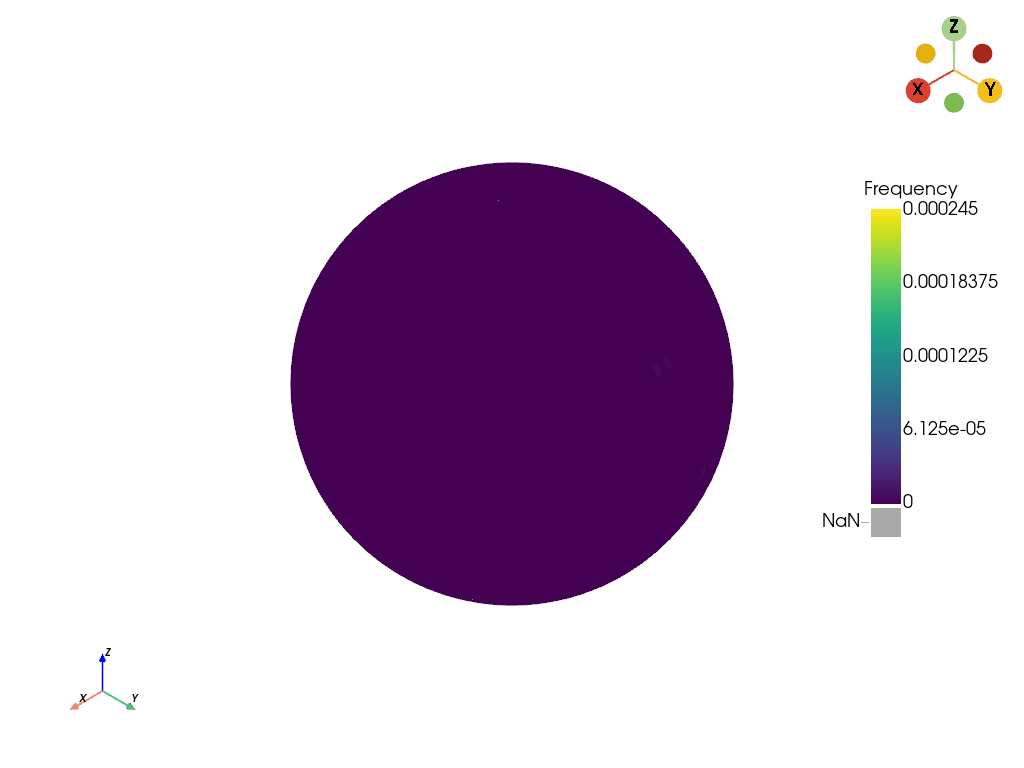
my_bivariate_plotter = vr.plotting.SpherePlotter(my_bivariate_meshes)
my_bivariate_plotter.produce_plot()
my_bivariate_plotter.show()
my_orientation_plotter = vr.plotting.SpherePlotter(my_orientation_mesh)
my_orientation_plotter.produce_plot()
my_orientation_plotter.show()
2026-05-21 05:22:42.741 ( 3.376s) [ 7332E4C3DB80]vtkXOpenGLRenderWindow.:1458 WARN| bad X server connection. DISPLAY=
Types of Animations#
And now for the part that you came here for! Let’s see how to create animations. We’ll see three different types of animations:
Nested sphere animations.
Rotation animations.
Custom animations.
The first type of animation only works for nested spherical histograms.
The other two work for any SpherePlotter.
Before going into the specifics for each, there are some parameters
common to all types of animations:
filenameDefines the path to the saved movie file. Must end with
*.mp4or with.gif.qualityThe desired image quality, between 0 and 10. Ignored if saving as a GIF image.
fpsThe frame rate, given as the number of frames per second. A higher value results in a faster animation.
We’ll look at each type of animation in a bit more detail. But first, we’ll be producing quite a bit of output from these examples. Let’s create a new folder to store all the outputs.
import os
output_dir = "./assets/animations-guide/"
if not os.path.isdir(output_dir):
os.mkdir(output_dir)
We’ll use this path name when exporting all animations to keep our files organised.
And now, for the animations.
Nested Sphere Animations#
These animations should only be generated for nested sphere plots. There
are a number of different parameters available that control the animation
itself, as well as the scene. Let’s produce some animations to show the
possibilities. Nested sphere animations are produced using the
SpherePlotter.produce_shells_video() method.
Let’s first set inward_direction=True.
my_bivariate_plotter.produce_shells_video(
os.path.join(output_dir, "nested_inward.gif"),
fps=8,
inward_direction=True
)
/home/docs/checkouts/readthedocs.org/user_builds/vectorose/checkouts/latest/src/vectorose/plotting.py:1214: PyVistaDeprecationWarning:
../../src/vectorose/plotting.py:1214: Arguments 'loop', 'fps' must be passed as keyword arguments to function 'BasePlotter.open_gif'.
From version 0.50, passing these as positional arguments will result in a TypeError.
self._plotter.open_gif(filename, 0, fps)
The shells pass from largest to smallest. Now let’s set
inward_direction=False to see the difference.
my_bivariate_plotter.produce_shells_video(
os.path.join(output_dir, "nested_outward.gif"),
fps=8,
inward_direction=False
)
The shells now pass from smallest to largest.
We can also use the boomerang parameter to have the shells go through
the reverse order after they have each appeared.
my_bivariate_plotter.produce_shells_video(
os.path.join(output_dir, "nested_boomerang.gif"),
fps=8,
boomerang=True,
)

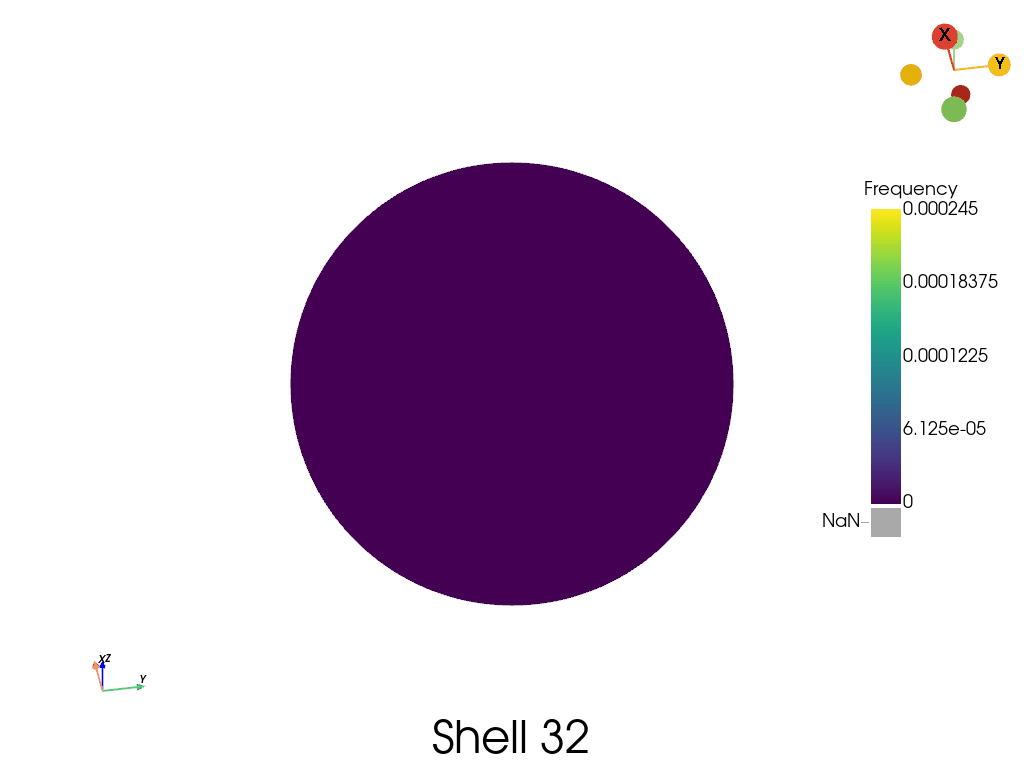
Finally, we can also add the shell number to the bottom of the video
during the animation using the add_shell_text parameter.
my_bivariate_plotter.produce_shells_video(
os.path.join(output_dir, "nested_shell_text.gif"),
fps=8,
boomerang=True,
add_shell_text=True
)

Now we can clearly identify the shells that are being viewed in the animation.
There’s a problem here, though! We only see one side of the sphere. We
can view other individual positions by using the
SpherePlotter.rotate_to_view() method and then save videos from new
perspectives, as well.
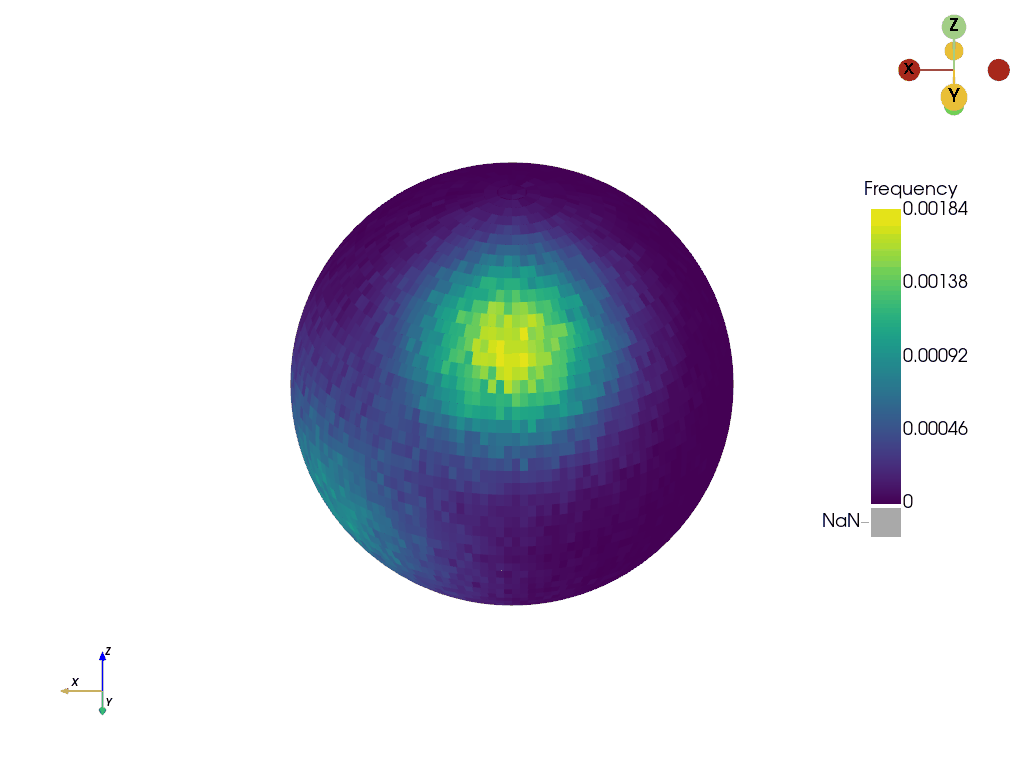
my_bivariate_plotter.rotate_to_view(phi=130, theta=80)
my_bivariate_plotter.produce_shells_video(
os.path.join(output_dir, "nested_rotated.gif"),
fps=8,
boomerang=True,
add_shell_text=True
)
Now we can see the different frequencies across the shells from a different perspective. But what about flying across the sphere?
Rotation Animations#
Rotation animations can be used for any spherical or nested spherical
histogram plot. In a rotation animation, the camera orbits around the
spherical histogram, saving frames to produce a video.
Nested sphere animations are produced using the
SpherePlotter.produce_rotating_video() method.
This method has parameters that control the number of frames generated.
A higher number of frames results in a smoother but larger video.
Let’s see some examples using my_orientation_plotter, which shows the
marginal orientation distribution for our data.
First, we’ll use a lower frame rate of 10 frames per second and produce
36 frames.
my_orientation_plotter.produce_rotating_video(
os.path.join(output_dir, "orientation_10_fps.gif"),
fps=10,
number_of_frames=36,
)

Now, let’s create 72 frames and have a video that is 20 fps.
my_orientation_plotter.produce_rotating_video(
os.path.join(output_dir, "orientation_20_fps.gif"),
fps=20,
number_of_frames=72,
)
Notice the difference? We can also control the zoom and add a vertical shift using some of the other parameters.
my_orientation_plotter.produce_rotating_video(
os.path.join(output_dir, "orientation_zoom_shift.gif"),
fps=10,
number_of_frames=36,
zoom_factor=1.5,
vertical_shift=0.5
)
So, we can now make videos orbiting around the sphere. Except, there’s a small limit. We can’t orbit around arbitrary axes. To do this, we need to use a bit of a different approach…
Warning
You can’t change the starting position of the rotation animation, even
using SpherePlotter.rotate_to_view(). If you want to produce
rotation animations starting from arbitrary positions, please read on…
Custom Animations#
In addition to using the pre-made animations, SpherePlotter
offers functions to construct custom animations.
For example, let’s say we want to create an animation going from the top
of the sphere to the bottom along a single meridian. We can’t do this
with the built-in functions, but we can with a custom animation.
The key methods involved are:
SpherePlotter.open_movie_file()- Start a new movie or GIF file.SpherePlotter.write_frame()- Add a new frame to the movie.SpherePlotter.close_movie()- Finish the movie.
Warning
The movie writer does not interpolate between frames. If you want a smooth animation, you need to make a lot of frames.
Let’s combine these methods with SpherePlotter.rotate_to_view() to
create a custom sphere rotating animation.
phi_values = range(0, 181, 10)
theta_value = 45
# Hide the sliders
my_orientation_plotter.hide_sliders()
my_orientation_plotter.open_movie_file(
os.path.join(output_dir, "custom_anim.gif"), fps=10
)
for phi in phi_values:
# Get the camera into the new position.
my_orientation_plotter.rotate_to_view(phi, theta_value)
# Write the new frame.
my_orientation_plotter.write_frame()
# Let's boomerang it manually
for phi in reversed(phi_values):
# Get the camera into the new position.
my_orientation_plotter.rotate_to_view(phi, theta_value)
# Write the new frame.
my_orientation_plotter.write_frame()
my_orientation_plotter.close_movie()
# Re-show the sliders
my_orientation_plotter.show_sliders()
By combining these methods, we’ve now created a new animation. There are many other possibilities for custom animations involving custom paths and activating shells in the nested histogram case.
Cleanup#
Now that we’re done producing all the plots, let’s close our
SpherePlotters.
my_bivariate_plotter.close()
my_orientation_plotter.close()
Summary#
In this tutorial, we’ve covered how to create a variety of different animations using VectoRose in order to fully illustrate the 3D nature of the spherical histogram plots.
Here are the types of animations we’ve seen:
Shell animations for viewing the different layers of a nested bivariate histogram.
Rotation animations for orbiting around a 3D spherical histogram.
Custom animations for viewing user-specified positions on the sphere.
Now not only can you produce histograms using VectoRose, but you can also export them and share them with the world.